Happy Easter, everyone! Today, we decided to dye some duck eggs to create lasting Easter decorations. I’d read online how to use silk ties to color eggs, and I thought duck eggs would be even better than chicken eggs because they’re larger.
Below, find 12 simple steps to create your own beautiful, unique Easter decorations. They’re great as family mementos or gifts.
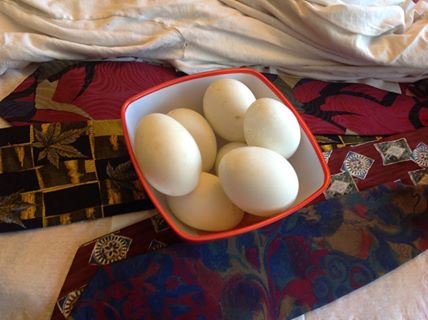
1. Gather your materials. Start with plain, clean eggs; silk ties, prepared as described below; zip ties or bread ties; neutral lightweight fabric, such as cut-up pillow cases or t-shirts; a large pot to boil the eggs in; something to cover them in, such as a colander or bowl; and a bowl in which to cool them – perhaps another colander, suspended over a separate bowl in which the water can drain.
2. Remove the egg yolks and whites. Instructions on how to do this abound on the Internet. This one is the best guide to blowing out eggs, for me at least. My husband did this part. He used a drill. Whatever you use, make a hole on the top and bottom of the (upright, as opposed to on its side) egg. Make sure the hole on one side is larger than the pinprick on the other. Blow the contents of the egg through the smaller hole, through the bigger hole on the bottom into a bowl. Make scrambled eggs and feed them to the dogs. (Have I mentioned our dogs are spoiled?)
Now your shells are ready. For those of you with your own chickens or ducks, I confess – I did not try to make sure mine were perfectly clean. I figured if I am boiling them and coloring them, they will be sterilized and any imperfections will be dyed.

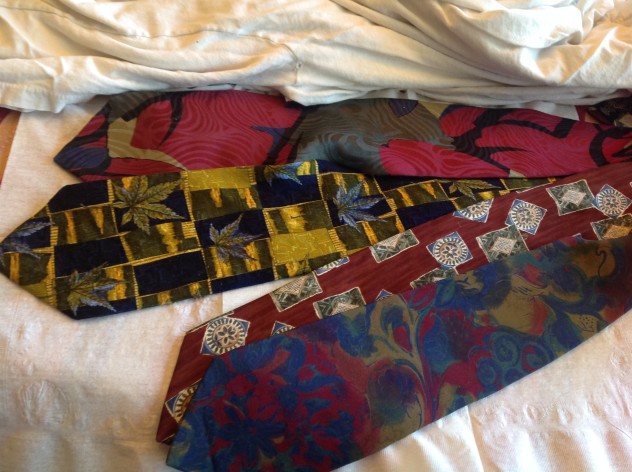
Find some brightly colored silk designer ties from the 80s with small repetitive patterns, they work best for tie dyed eggs,
3. Gather your silk ties. I bought mine at Goodwill. They need to be 100% silk. I learned after my first batch of eggs that small, brightly colored repetitive patterns work better than large swaths of bright colors. The latter just make solidly colored eggs.
4. Carefully clip the stitches on the broadest (bottom) part of the tie and remove any material you find inside the tie. You only want the silk. Each tie can dye more than one egg if you’re careful with your cutting. Cut away the black back of the tie as well. You only want the patterned silk.
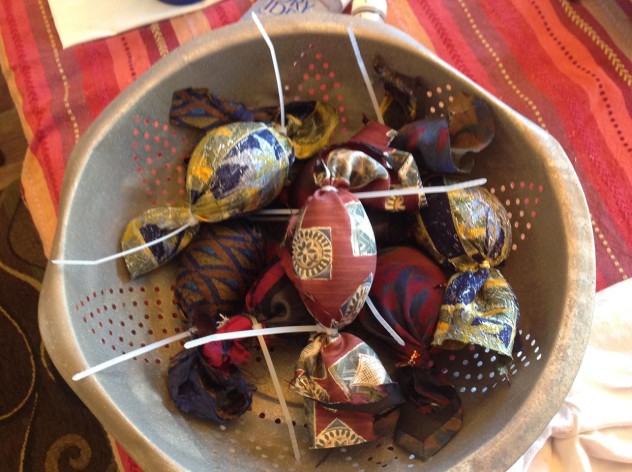
5. Cut blocks of each tie large enough to roll an egg and cover completely. Leave room to tie each end. Roll the egg with the outside of the tie silk – the colorful part – against the egg shell so the transfer will be strong.
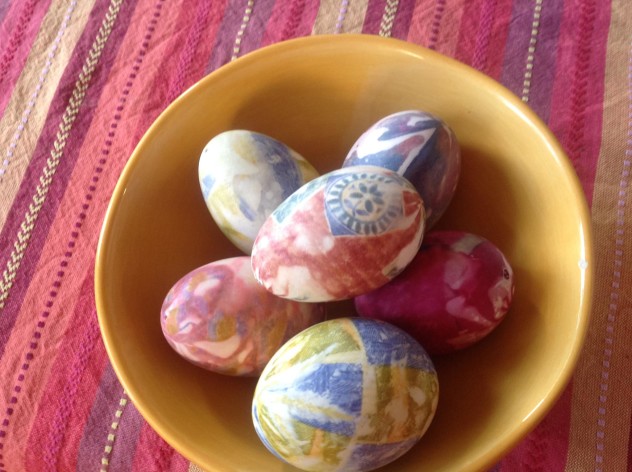
If you plan to display your eggs in egg cups or on an egg tree, make sure the pattern will show up on the top of the egg. If you plan to display them in a bowl, then roll the silk so the patterns are most visible on the large sides, as above.
6. Tie the silk on each side. You can use zip ties, as above, or bread ties. Make sure the fabric is snug against the eggshell.
7. Wrap the silk covered eggs in a lightweight neutral fabric and tie them again. I do not have a picture for this, regrettably, but you next need to wrap the silk wrapped eggs in a lightweight colorfast fabric. I used an old undershirt of my husband’s. I was worried it was too heavy, but it worked perfectly. Tie the ends just like you did with the silk. Make sure the silk is fully covered with the neutral fabric: otherwise, it will bleed into the pot where you will boil your eggs.
8. Put the doubly wrapped eggs into a pot and cover them with water. Add 1/4 to 1/2 cup vinegar, depending on the size of your container and the number of eggs. (I used 1/2 cup for seven duck eggs.) Since the egg shells are so light, they will float. Put a colander – or a bowl that can withstand boiling temperatures – in the pot over the eggs. Turn the heat up to high.
9. Bring the water to a boil. Once it’s hot, you’ll want to boil them for at least twenty minutes. Since the light, buoyant eggshells have trouble staying under water, covering them as mentioned above is a good idea. Once the water began to boil, you start the clock on your twenty minutes. Personally, I watched them and turned them every few minutes so they did not float to the top and not color one side. Once the external fabric became almost transparent and showed the silk underneath – which, at 7,200 feet altitude and lightweight eggshells, took forty minutes, not twenty – I took them out of the water.
10. Let them cool. I placed mine in a metal colander over another pot. There was no color transfer to anything I used – much better than dyeing eggs the traditional way.
11. Unwrap them and discard the wrappings. Let them dry or dry them off. Once they’re cool, they are colorfast.
12. Blow the water out of the shells. They will be filled with water. Blow through the small hole and out the big hole again. (I was momentarily concerned that I would end up with batik-patterned lips – fortunately, that did not happen.)
If you did all of this reasonably well and the tie was a good one, you’ll have eggs with clearly delineated patterns that are almost batik. Worst case, you’ll have lovely long streaks of pretty colors. Either way, all you need to do is thread a ribbon through the two holes, add a few beads on either side, and you’ll have a beautiful ornament and a memento for future Easters.


